• Skip to main content
  • Skip to primary sidebar

Pattie's Place

  • The Weekday Chef
  • Pattie’s Classroom
  • Pattie’s Primary Place

Salads and Salad dressings YUM!

02/02/2011 by Pattie Leave a Comment

I love eating salads. I especially love them when they have fruit and toasted nuts in them. But the best part is if they come with a wonderful, homemade dressing. I love to cook and try new things. I found a website that I really love. That is the Jessica Seinfeld website.   It’s called DoitDelicious.com.

Jessica Seinfeld teaching Oprah a thing or two…

 She teaches her friends to cook with short videos and does real easy stuff that takes 20 minutes, but that tastes delicious. That is right up my alley. I bought her book for my daughter last year and I bought one for myself too. See the link  HERE She likes to hide pureed veggies in things like chicken nuggets and brownies (great idea!) I have found that adding things like applesauce and puddings to cakes made them very dense and rich. I’ve done that for years. I’m sure it is the same principal using pureed veggies.

Cute Gwyneth…who knew she could cook!

I also like to read Gwyneth Paltrow’s blog called GOOP.  She spends a lot of time on her blog and she is a really good writer. I appreciate all the different ideas she shares, from travel, to cooking, to eating right and exercising. On the GOOP website I found an interview Gwyneth did with Jamie Oliver the Food Revolution guy. He is a very good cook.  He has some wonderful recipes with lots of ingredients (unfortunately) but very short prep time that I have fun trying.  He gives 4 yummy salad dressing recipes that sound really mouth watering and I’m trying them.  The link is HERE  for Jamie’s salad dressing recipes.

Here’s another salad I love, Tai Chicken salad. Yummy! It tastes like something from Pei Wei.. it’s got those yummy noodles.  It’s from Martha Stewart’s website. Find the link HERE
I liked Gwyneth’s blog when she  talks about how she got in shape to do the IRONMAN movie playing Pepper Potts. I LOVED that movie, both 1 and 2.  I love Robert Downey Jr., too of course. He’s such a dollface!

 Well, this tortuous routine made it clear why she looks as svelte as she does in that movie and how she could wear all those tight skirts and tops and look so terrific after a couple of kids. It looks arduous to say the least. Link is  HERE 


greek artichoke salad…yummy


It’s been so cold outside that we’ve been having INSIDE DAYS at school. That means the kids stay in the classroom all day long without a break. I cleaned out my rainy day cabinet and added some new games and the first graders are very content to play Candyland, Checkers and Chess, Legos or Playdough, or lots of other fun activities. They only come out on rainy days or inside days, so it is something they really look forward to.

I even have a kiddie rug of a city and a basket full of little Hot Wheels cars and they have a boatload of fun with that.  Amazingly, the bin full of dinosaurs is always used by girls and boys alike. They just act out stories and adventures with them. It is really fun to watch them actually. You forget how fun it was to be a kid.  So anyways on days like this, you want to come home and make some hot, comfort food like soup and salads. 

I’m kind of on a kick lately though. My alltime favorite recipe for fish is one I make at least three times a month. It is pecan crusted Salmon with a mustard honey sauce and a crunchy topping with breadcrumbs and crushed pecans. I make it just with a leftover heal of bread diced up. Here is a recipe. HERE is Baked Dijon Salmon. The secret to fish is getting it in a hot oven for a short period of time, but with the crust it is trickier because you don’t want to blacken the crust, just golden brown it. So I bake it for 4 minutes and then broil it for 3 minutes, and that usually does the trick, high oven, like 400 but I put it on the middle rack.

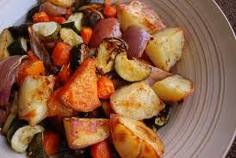
roasted veggies…yummy too!

My favorite side dish is roasted veggies on a cookie sheet on 450 just with a little olive oil and sea salt, sooooo yummy you will want it for an afternoon snack in a little tupperware the next day. Sweet potatoes and red pepper and mushrooms are especially delicious, but you know, I have even put carrots and potatoes in there when I had nothing else and they turn out fabulous.  The natural sweetness of the veggies comes out when roasting them.  This with a fresh spinach salad with fresh blueberries or dried cranberries and avocado with a raspberry vinegrette is like, so my fav dinner!  If you’ve never roasted veggies before, watch this video, that’s how I learned how. Link is HERE..

  Try not to freeze your #%@ off this week! Go make something hot and yummy. Mmmmmm. Cooking is one of life’s simplest pleasures.

Filed Under: Uncategorized

Valentines Cards

02/01/2011 by Pattie Leave a Comment

I love Valentines Day. I like to do lots of crafting in my classroom with a real purpose. If I can get the kids excited about CREATING a really pretty card, then I can encourage them to do some good letter writing going through the writing process, editing, and rewriting, and the whole bit.

Cute Valentine Gifts for my grandkids….

And for my hubs…..

He loves powdered donuts and Klondike bars.  

Cookie decorating in my classroom is always fun on Valentines Day. 

I used to come up with a prescriptive card. I don’t do that anymore. The kids have always come up with something more creative when I let them just take a group of materials and do it their own way. So here is a way to have a LOT of fun, doing some very creative work.

I pass each child out a copied off page of Valentine “clip art” (decorative hearts, cuddly bears, a nice big Happy Valentines Day, cupids, etc.) , a doily of their color choice, construction paper folded in their color choice (pink, purple, red, magenta etc.), some stickers, some foam peel and stick shapes and a candy foil heart. Usually I can find these in a bag of 24 at the grocery store for pretty cheap. I pull out all my Valentine rubber stamps and they can add a few stampings to their cards when they are mostly done.

We make decorated valentine holders and decorate them with all sorts of papers……

Then we write about what we love about ourselves…..

Cute handmade Valentine Holders……

Then I let them go at it.  There are some fun tutorials out there that explain fun additions like a heart origami as part of the card. You can find that link here. http://www.craftyartworld.com/origamiheart.php

My only rule is that you have a limit to how much stuff you can put on your card. Tell them 5 or 6 things.  Some kids will go a little too crazy. My other rule is you must color the clip art before you cut it out and glue it down.. And a suggestion I make is always to not have a ton of stuff hanging off your paper, because that doesn’t look as nice. 🙂 No matter what I say, I still have lots of stuff hanging off the page, but this at least, limits it a bit. 🙂

After they have designed their front and back we glue gun the chocolate candy hearts to the middle of the doilies. They always turn out beautiful and unique. Then we write our sloppy-copy Valentine letters to mom. I will edit the boo boos and then students get their choice of pretty final writing paper stationery. I usually have 4 designs on 4 colors to complement the cards. The other rules are: 1. very best handwriting, and 2. They have to nicely color the top of the stationery in at least 3 colors.

Making Valentine bracelets with colorful pony beads and pipe cleaners. 

Cookie decorating on Valentines Day. 

My favorite. Hersheys and Kisses and cookies altogether. Yummy! 

Some of the Valentines Day cards and presents. So fun! 

 Hope you all have a Happy Valentines Day! I love this holiday so much!

Filed Under: Holiday cards, Valentines

Happy Chinese New Year!

01/29/2011 by Pattie Leave a Comment


 My class loves to study other cultures. Being a teacher educated in one of the true melting pots of America, Long Beach, California, a large port city, I was taught how important it is for other cultures in your classroom to be represented in your read alouds, hero study, art projects and social studies units.  So every year I like to introduce the students to Chinese New Year. I teach a gifted group and I always have many Asian children in my classroom makeup. So it is fun to ask the parents of several students to bring in cultural items from their home that will teach the students something about the Japanese, the Chinese or the Korean culture.

We’re all ready for the Chinese New Year parade!


Addie, Andrew, and Mrs. Kim, showing the Korean festival outfits.


 One of my Korean students is Andrew. And his mom is Mrs. Kim.  She offered to come in and give the kids some realia of Asian culture. Mrs. Kim brought in some Korean games, festival outfits, Korean coin money, and some rice cakes (you boil them, they aren’t cakes at all, who knew?) She is one of my monthly mom helpers. We LOVE mom helpers in our class!


Here is Vera,  showing the rice cakes. The American variety are dry
puffed rice…who knew? These look much tastier!
After we read a cool Weekly Reader on Chinese New Year celebrations and the story of Sam and the Lucky Money, a real heart-warming story of how a Chinese boy is given leisees, or “lucky money” by grandpartents to celebrate Chinese New Year. After perusing all the shops in Chinatown, he gives it away to a homeless man with no shoes, to help him buy some warm socks. I always get choked up and start tearing up as I get to the end of the story I’m such a sap when it comes to a tear jerker ending.
Then we read and act out the 7 Chinese Brothers. It is always a hoot! I have chinese pointy hats I bought last summer at an outdoor market and we use those to depict the different brothers. They love to dramatize and
role play, we have some future drama queens in our class!
This is a wonderful story book for kids Link HERE
Then we eat fortune cookies and play with chopsticks, trying to pick up little fuzzy balls with our chopsticks. Then we write fake fortunes and roll them up and everybody gets to come up and get one. Nobody knows who wrote them or who receives the one they wrote. Well, yes they actually are bad at keeping secrets, so by the end of the day everybody knows who got whose.
The next day we do some fun art. We made some Chinese lanterns out of construction paper. I folded paper in half and we cut across the entire piece in in inch increments, leaving the edges uncut about 1/2 inch.
If you want the kids to cut straight lines, have them draw ruler lines
one inch apart, good math lesson for learning inches!
Open the folded part, wrap it around, then glue together, that’s it! Easy!
We then glued a 1 inch white strip to top and to bottom edge.

 We wrote on the white strips some chinese numbers we had in our Weekly Reader. It was fun for the kids and now they all what a 1 and a 5 look like and how to say them in chinese! It was kinda cool!


Oriental Trading…a great place for crafty doo dads  Check it out!
I think this package is upside down, my bad!


We then added a white strip along the tops and bottoms and put Japanese numbers and characters along the top in black.Then we used some Oriental Trading peel and stick foam decorations for Chinese New Years to decorate along the tops and bottoms of the lanterns. I think each student used 8 of them, 4 for top, 4 for the bottom strip. Lastly, we added a few crepe paper streamers to each one with a dragon or fish or lion decoration the students had colored. Then we glued them to the streamers. Don’t they look cute?

Notice the black scrolling on the white strips…it’s numbers!

Then we watched a Utube of a Chinese New Year Parade in San Francisco’s Chinatown with the giant dragon puppets maneuvered by a 5 or 6 guys. We read another story from our Basal Literature book called Chinatown.  Peter taught us something that I didn’t know. Karate is a Japanese sport. Tai Kwan Do is Korean, and Kung Fu is Chinese. So there you have it. I learned something today from a 5 year old!  Peter takes Tai Kwan Do, here he is in the white Tai Kwan Do outfit with the black belt.


Peter is showing his Tai Kwan Do outfit and some Korean games…


Our classroom ceiling decked out with our handmade Chinese lanterns…


Another book I will read them is Two of Everything. It was written by an acquaintance of mine who is Chinese. It depicts the culture in the homes and decor and dress of the characters. It is a cute story too about how everything that falls into the magic pot doubles, until finally the owner of the pot falls in and doubles himself! That presents a problem because his wife really doesn’t want two of HIM!  gee, being a wife myself, I wonder why? Hmmmm.


Another really wonderful children’s book.


The Chinese kids are showing their “leisees” with Lucky Money.


Then we made some dragon puppets for the 1st/2nd grade parade around the school, this year on February 3rd. We will be singing, banging and clanging drums and cymbols, and yelling Gung Hay Fat Choy to everybody. That means happy new year in Cantonese. It really means “may good fortunes come your way” if you want a literal translation. I like how in the Asian culture red means “Lucky”. So the red dragon coming by your store or shop will bring you good luck. It’s kind of a sweet notion.  I gave all the students leisees of lucky money red envelopes and told them to do some special chores around the house so their parents can fill them with “lucky money!” Picture HERE 


Our colorful Chinese New Year masks! I bet you wanna come to the parade now, right?


So here are our dragon puppets. We colored them, put some groovy feathers on top and some large, round, sequins, to add a little BLING, and we cut out the eyes of the dragon so we could look out of the mask. How do you like them? Well….anyway…. I hope you all have a Happy Chinese New Year!


Gung Hay Fat Choy! Happy Chinese New Year!


Filed Under: Chinese New Year

Remodeling the Guest Bathroom

01/27/2011 by Pattie Leave a Comment

Well, our third remodeling project in the Trifecta last summer was Remodeling the guest bathroom, after the kitchen and the walk in pantry/bathroom redo.  I think of all the remodeling I love this room the most. It has a very peaceful color scheme and it just seemed to come together very nicely. 

I loved the mirror project we did, the vessel sink in granite, even the shower curtain and rugs match pretty good.  I lucked out on so much stuff. I got the shower curtain for $3.50 from the T.J. Maxx superstore in St. George on clearance. Such a deal! The light aqua rugs were on clearance too, I love that really fat loopy yarn look in rugs now, very 70ish….Every time we go t Tuacahn outdoor theatre in the summer we go visit the giant T.J. Maxx….well John walks the doggie while I go shop for a half hour…LOL

We had this $250.00 piece of granite we had purchased at The Tile Outlet in Draper just sitting around the garage for months. It was a 2nd that had a few little flaws and pocks in it. But we knew we could cut around those or fill them with silicone if we couldn’t work around them. And we wanted to use it for both of the bathroom remodels. 

We had to cut out sink and fixture holes in the granite so the flaws wouldn’t be a problem. And it turned out to be the same granite type as our kitchen granite. I think it is called Santa Cecelia or something like that. It is a very popular creme with black and gold flecks in it.  Anyway we asked Tile Outlet if they could cut and install the 2 bathrooms.  So they worked on cutting them to our sink specifications while we went looking for vessel sinks.


I was kinda stuck with a blue tiolet and tub…but I kinda like em!


I must admit that vessel sinks come in so many types and varieties I was on the internet for weeks trying to decide what I liked best.  I have a blue tub and toilet in this guest bathroom that I kind of like. They are older but they are pretty and were custom when they remodeled the house right before we bought it 12 years ago. So I went back and forth deciding  if I wanted to rip them out and just get white or not.  So we decided that we could eventually do that someday, but that we wanted to go a little simpler on the remodeling from here on out. So we left the blue toilet and tub in. So ergo we had to have blue as one of our guest bath colors.

My good friend Aimee gave me this beatiful potted orchid…luckily it’s fake..cuz I’ve got a black thumb!

Remodeling a guest bathroom can be challenging…all those decisions to make. I decided to go with a beachy theme first.  I got a light blue color of paint and painted the existing cabinetry this light blue. Then I went over the edges with sandpaper and made it look kind of distressed and “beachy”.  Well, I thought it would look really good, but I didn’t like how it turned out.  That happens sometimes in remodeling. You try it, you don’t like it…you change it again.

Tiffany, my daughter and I painted moldings and glued onto existing mirror…Cool frame! 

The same thing happened to the wallcolor.  I tried so many different shades of blue before I was satisfied.  It is such a bumber to buy a gallon and then not like it on the wall too, isn’t it? I hate when that happens.  So just simply painting the walls and cabinets took weeks. It was very discouraging to me.  I THOUGHT I had good gut instincts on paint, but to tell you the truth, I really don’t.  My husband is the one who DOES! Funny thing.  So I have come to rely on him to choose the shades once I have narrowed down the color I want.  And ALWAYS go a shade lighter. You won’t be sorry there.  It always looks darker on the wall. 


I broke the lid off this cute jar…so I filled it with Q-tips! It worked like a charm!

So the 2nd time around I painted the cabinetry black in an eggshell black finish.  It looked 1000 times better than the sanded beachy blue (which kind of looked too messy or unfinished or something). Then I found the perfect shade of pale blue in Glidden  that wouldn’t clash with the toilet and tub on the walls and painted the whole room.  Then we hired the contractors back to do tiling on the floors and we did a similar tile to the laundry room, just a tan, porcelain tile.  Pretty basic. I think we got the tile for 68 cents each at Lowes. We had to travel to about 3 Lowes in the Salt Lake valley to get enough, but it was worth it to me. It was only like $60 bucks for all that tile, maybe less.

I thought this wire basket would be cute for towels, but John has ‘
taken it over as his bookshelf while he soaks in the jacuzzi tub!

Then we had the granite installed over the black cabinets and the small hole cut for the vessel sinks and had them rip out both of the previous sinks. In this blue guest bathroom there had been 2 sinks, but we only replaced one sink, to make more counter space. Then we decided on a granite vessel sink. It was kind of expensive, I think $150 at Stone Depot, but hey, it is carved granite!  I am glad I didn’t go with glass vessels or porcelain sinks. And do you know why? I hate to clean very often, and that sink NEVER looks dirty. It’s speckled with granite for heavens sake, so it looks perfect all the time. A tip from the Stone Depot owners. 🙂 Thanks for the tip! I’m not sure I want to remodel a bathroom ever again either….

Granite counters and granite vessel sink…always looks clean!

Glass sinks would have been a nightmare to keep clean. Can you just imagine! YUCK!  The little Chinese lady gave me lots of good advice down at Stone Depot in Salt Lake City where we bought the vessel sinks for both bathroom remodels. She was a gem.  But her scrap pieces were not as cheap as Tile Outlet so we bought counter granite from them for the small bathroom countertops. (being the cheapskates that we are…) Link HERE

Cute blue pottery bowl with handles from T.J. Maxx, love that store!

Anyway, then we did this cool thing to the mirror. We had just a plain mirror. But it is giant and still in good shape. So my daughter saw this idea on a blog with a tutorial. So she came over to help us make it. First we went and bought wide molding pieces and painted them black and cut them at 45 degree angles to fit all around the mirror. We used Liguid Nails glue (the glue that you shoot out of a gun…it is at Home Depot or Lowes) and glued the molding pieces right to the wall around the mirror. Be careful when you do this because the back of the molding shows in the mirror so you actually have to paint the front AND back of the molding pieces, at least the parts in back that will show. We didn’t realize this until we’d already glued a piece on and the raw wood showed from behind! So we had to quick take it off and add paint and then glue it back on again.

 Then we pounded in some skinny nails to the moldings just around the 4 edges to be sure it wouldn’t fall off while it was drying. It turned out so pretty! I’m doing this to all my old bathroom mirrors eventually. What a cool face lift!

Finished remodel of the guest bathroom

We bought the 1 piece faucet fixtures from Overstock.com in brushed nickel. I think they were $115.  I got the same design for both bathrooms but the blue bath has all brushed nickel fixtures to match this cute glass shelf I bought from Pottery Barn. It is so pretty. Then we bought new towel bars and toilet paper holder in brushed nickel finish too.  Then I potted a fake plant in a pale blue pottery container  and had another fake orchid plant I’d been given from my sweet friend Aimee (a wonderful crafter herself). You can see it to the left on the counter and the one I did is on the toilet. Fake plants are better for me since I seriously have a BLACK THUMB!  I kill any kind of living plant.


Here’s the fake plant I arranged in a pretty pot….I kill anything living!!
Blue ceramic pot from Joannes Crafts

The last thing I did was matching the towels, the counter decorations, the rugs and shower curtain. I found a cute aqua sign that says “Relax” in wood lettering and put that up in the window with a new, white faux wood blind. And I found a cute little creme color wire rack to hold bubble baths, soaps and extra towels. I think I found that at Gardner Village Whites Shop. I loved that place so much, I was so sorry it went out of business.

Cute stuff here and there..in the guest bathroom remodel.

 I really like the little Pottery Barn glass shelf, the fat blue yarn rugs, and the pale aqua towels  I got from T J Maxx. That is my FAVORITE STORE!  I got the HOME saying from Hobby Lobby. (My other favorite haunt…It’s a craft junkie’s paradise. 🙂  This is my favorite bathroom in my home. Black and light blue is just simply a wonderful color combination, don’t ya think? I’m so glad it is done too. Now onto the guest room redo.  We are still only half done in the house.  Still a craftroom, and a 2 bedrooms to redo…but they are coming along just fine….stay tuned…..

Filed Under: bathroom remodeling, granite vessel sinks, mirror redo with molding pieces

Making a Fabric Window Cornice

01/25/2011 by Pattie Leave a Comment

I think the last thing we did in the Kitchen Remodel was the window treatments. We learned how to make a Fabric Window Cornice. We really wanted to replace the old metal sliding glass door and put in a beautiful wooden one with those neato shades that are on the inside you just pull a switch and they appear and block out the view. But we were paying for a wedding this same summer we remodeled so that has been put on the backburner for now.  Maybe next summer when we are planning on redoing the backyard decking and adding a jacuzzi, that would be the time to add the glass door. Anyway, we decided that a nice thing to do for now would be a handmade window cornice for up above the wood blinds and vertical blinds.


Johnny’s little bird clock, he LOVES that clock, it chirps a different bird every hour…..
He has a few birdhouses outside on the deck and a hummingbird feeder too. He loves birdwatching!

 We bought some wood blinds for the kitchen window (if I had it to do over I would choose white, it really darkened the room to have wood).  I like the look of wood in our office, but the thing is since there is only one window in most of my rooms, it doesn’t bring in the light I like. Especially in the kitchen where I specifically chose light cabinets and light granite so I wouldn’t darken my room. So now when I buy blinds, I have tried to only go with white from now on.  It helps reflect the light from outside in better than brown wood slats do. 

Anyway, making a cornice is super easy.  All you need is a piece of plywood, cut to the length and width you think you need. Then a few side pieces cut to the depth out from the window you want the fabric cornice to hang. Then get some fabric you like, upholstery fabric remnants are really good, that’s what I found for $4.00 a yard at an upholstery fabric store.  There is one in draper on 124th just West of the 15 Freeway in Draper. Find the link HERE They have sales about once a month and put all their extra stuff in big barrels around the store. They also have cornices all done up with cool decorative medallions and swags all around the top walls of the shop. You can order one from them, already made up in your choice of fabric, or you can get ideas and ask questions from them. They were very helpful over there, even though I always planned to do it myself.
(being the do it yourselfer than I am…hehe)


This is the fabric window cornice over the sink. I liked how the wood blinds look, but
they sure don’t let in bright light…I  definitely need more lighting…

 Get a staple gun and scissors and some sheet batting.  I just bought a bag of blanket batting at Joannes Fabrics link HERE for about $6.00 bucks with a 40% off coupon.  Then layer your batting first and material second onto the piece of plywood and stretch it around to the back and staple it down.

 I didn’t do a real pretty job, it is kind of messy in back but it won’t show, it will face the window. I tried to tuck the raw edge under before the final staples just to be a little neater with it.  Then I had to do 2 end pieces the width of the cornice but we measured how far out from the wall we wanted to build it before we cut the length.  I think it was like 5 inches from the wall.  Then I did the same thing to those 2 pieces, batting and fabric, staple it all down.

On this window below we tried it a different way. We attached the side pieces of wood first, and then covered the whole curvy piece with fabric and batting all at the same time, and then staple gunned it down to the wood.  It was definitely easier the 2nd way. But both ways LOOK pretty good. (we learn as we go…)


New sliding glass door cornice 

 Then John bought some L shaped brackets and put the 2 end pieces onto the long main piece with some L brackets.  And he had some other brackets he found to hook onto the side of the cornice sections and then hook the other side to the wall. They were our first time, we didn’t use a book or instructions, we just tried it….and it worked fine. I think those were L brackets too.

I love the fabric window cornices. They look very rich and tapestry like, and they look kinda custom. If we had been more talented we would have tried a curvy shape on the bottom, but we just went with simplicity.  It is not too late to add a swag or medalion to the sides. You can get books on cornices in the city libraries. I’ve seen them there and maybe someday I’ll mess with them and add something to the top or sides.  For now, it is finished!  3 cheers!


The fabric window cornice is kind of a shiny brocade in a sage green with rust and pumpkin

 The thing about remodeling is you cannot expect things to be done quickly. Even if you are having it done by a professional, they screw up timelines sometimes too. It takes soooooo long to get it all done down to the details. And do it yourselfers, well we get tired and quit for a stretch….and then pick it up again when we get our 2nd wind. So it is not an exact science or anything.  But to see it go from your brain through your creative handiwork, to the finished product is kind of a rush. Well, not just kinda, it is definitely A RUSH!  I love to decorate. It is very rewarding to me.  I hope you enjoyed the kitchen. 

The next thing we did was our guestroom. The craftroom is still a work in progress I’m not progressing very much lately though… (such a slacker!)but I must just give myself a break on it.  I work with 1st graders all day, and those little guys wear me out sometimes!  I’ll show how I did the guestroom next. It is very pretty.  Watch for a birdie theme….I’m a birdhouse collector…

Filed Under: Handmade window Cornices

Polar Bear Watercolors & Winter Acrostic Poetry

01/25/2011 by Pattie Leave a Comment

We went TOTALLY Polar last week and did some Polar Bear Watercolors. I found this neat link to a teacher who teaches art in an elementary school. She had a beautiful website that I just loved. So since I have a document camera in my class I can shoot anything from my computer up on the wall,  pull-down screen. So I showed the kids some of her finished products with 1st and 2nd graders and showed them how she only used a few colors to do a fabulous evening snowy scene in an arctic habitat. (This would have looked a lot better on watercolor paper but I’m saving mine for the spring to do flowers on a picket fence, the paper is so expensive I can’t get a class set for every project!)

I love this one, this little guy is only 5! Cute Polar Bear Watercolors

The link for her wonderful work is HERE. It is called That Artist Woman.  She is very talented.  Anyway I scrolled up and down and we looked at how she did it.  Then I gave the kids 2 pieces of regular white construction paper 9 x 11 and we just dove right in.  I sprayed their papers with a spray bottle to get them kind of moist. Then I went around spraying their watercolors and gave each pair of kids a paper cup of water and a paper towel to share and paintbrushes. And we just started with blue at the bottom and made a “hill” for the animals to roam around. Then we added a little orange and yellow for sunset. Some of the kids added a little red too. Very watery I told them, very see through. Then we finished with purple across the top, like a real purply sunset.  The one thing we did was I cut them all out a moon circle to lay over their work before they began. I think next time I would put a little piece of tape under it because for most of them it moved around too much and they lost the moon image.  I shoulda thought of that!


Winter Watercolor Scenes and Acrostic Poetry

Then I found a clip art page of arctic animals outlines of a polar bear, snowy owl, snowshoe hare, hedgehog, etc. When their polar bear watercolors dried, or while they dried we cut out the shapes they decided to use in their snow scenes.  My only direction really was just choose no more than 3 per picture.  Then when their pictures were dried we glued on the animals we chose onto the 2 pictures.   I told them that I would put one, their favorite, up on the outside bulletin board. The other one could go home. The papers start to curl up when they dry so I had them put their fat, heavy literature books on them while we went to recess.  So here is our finished products. They turned out pretty, I think.

Winter Acrostic Poetry

Polar Bear Watercolors

The acrostic poems we did are all about winter. We brainstormed winter words for W…then I….N….etc and put them all across the front whiteboard.  I couldn’t believe how good they were in coming up with creative words!  Well, except one of them came up with Elephant for the E.  I said, “Now when have you seen an elephant walking around in the winter in Utah…hmmm?” They thought that was funny and we all laughed. So we nixed that word.

Winter Acrostic Poetry

Then they had to use the word in a sentence or phrase on each line.  We did them on sloppy-copy, lined   paper first, then I edited them for spelling, then we rewrote them on the nice white final-copy paper. We
colored the little doo dads on the side with crayon.  And I backed them with blue or purple paper for a border.  We read some winter books about polar bears, Hedgie the Hedgehog, The Mitten (which names lots of winter animals)  while they finished their cutting and pasting. It was a fun afternoon.
Don’t you wish you had my job?  Teaching is the best job on earth.

Filed Under: Uncategorized

Refinishing a Diningroom Table

01/24/2011 by Pattie 2 Comments

The next big project I did off and on while John was doing demolition and then putting in new cabinets was refinishing my Diningroom Table. I had a very long and light oak table that would fit my whole family for dinner, or a large party of 12, and I couldn’t find anything I liked as much. So I decided to just give mine a good facelift. I stripped the table with paint stripper sanded the tabletop and the 2 leaves down out on my backyard deck. It took me a week, I sanded that thing to death. Then I sanded each of the 8 chairs and the painted china hutch too just a little to get off some of the varnish. That is not fun but I wanted them to really look nice and new.

This is a pic I found of our kitchen before the redo…green hutch in the background…

I don’t know if it shows but the hutch in the background was dark green and had a bunch of stemmed glass holders…you can see the glasses hanging down. But we aren’t wine drinkers or anything so I wanted to change those. So as I was sanding everything down I removed the screws for each of those and sanded and puttied up holes. Then I was ready to repaint in black. You can also see our old cabinetry to the right in the above picture and our white tiled countertops. Very old and depressing. Those cabinet doors didn’t even fit right anymore from so many kids hanging on them and swinging on them. You know how boys can be….well….meybe just MY boys….

Refinished Diningroom Table

Now it looks like this! No more light oak anywhere. Even the stain on the table and hutch is a little darker now. I just spray painted the ball and claw table bottom. It was easy once it was turned upside down out on the back deck.

Chairs went from light oak to flat black

After going back and forth I decided to paint the bottom of the oak, ball and claw table flat black, and the oak chairs a matching black. It took 2 coats. I think I tried some chairs in flat paint and some in eggshell and I think I actually grew to LOVE eggshell finish paint. It looks flat but it’s just a little less dull. Does that even make sense? Just trust me. On wood and wood trim eggshell finish looks really good.

Then I stained the freshly sanded oak tabletop piece a darker shade to match my knotty alder cabinets. It turned out pretty close. It was really fun staining fresh wood. I liked doing it and I liked the smell of the stain. (No I wasn’t huffing the stuff, it just smells cool!) Then after a few rubs and coats of stain I let it dry a few days. Then we finished it with a coat of polyurethane varnish. It was fun to do this project out in the sun on my deck. We put an old 8 foot table out there we’d bought at a garage sale that had seen better days. It has been kind of my craft table for many years.  (But sadly it is going to the dump after this redo is over).

See, no more stemmed glass holders! I like it better now.

The china hutch was painted dark green and oak. I painted over the green in flat black paint. It was tedious but it turned out looking pretty. I painted all 8 chairs from light oak to black. I tried spray paint but I couldn’t get it very smooth so I hand painted all of them with a foam brush and Glidden flat black. I always loved this table and because I did it myself it may be my most favorite project of the bunch, well, after my new island. It turned out very nice.

Refinished diningroom table and chairs

We added a foot more cabinet length to the cabinetry on both sides of the kitchen so I’d have enough drawers this time and a little less feet to the island than to our old, L-shaped countertop. So I am able to keep the 2 extra leaves in the table year round. It was such a pain to add them and take them out every time I had a dinner party. Now it is easier to entertain a large group. I just keep the long table up all the time! 

I like how the black chairs look on the tan travertine tiles…cool!

The refinished china hutch looks so much more updated in the new black color, I love it.  I change the decorations on the bottom row of the hutch for each holiday. It was pretty easy overall to give these pieces a face lift.  I would do it again. (well not really, I’m lying again. I never want to do this much painting again..)

I love my new Refinished stuff…
And the new mercury glass decorations….

And the whole kitchen table and hutch facelift only cost me a lot of elbow grease during my summer break from teaching, and a few gallons of eggshell finish, black paint. And although I loved the results, I really don’t want to paint again for another few summers. I did get my fill of painting, considering I also painted the kitchen, the bathrooms, 2 bedrooms and the entire basement this past summer. I’ve become a paint-a-holic…I may need a 12 step program or something…..

Filed Under: Refinishing Wood table and hutch

Gallery Picture Wall

01/23/2011 by Pattie 1 Comment

I painted and painted and painted anything and everything. It really is the best and cheapest facelift you can make to a room. It is funny because when you get something newly painted in a room, everything else around it looks so dull and old, you just naturally have to go around adding paint to everything else.  I painted all the walls a light chocolate color. We really liked Home Depot Glidden paint the best. It seems to cover better and it is not quite as much as the Behr paint and primer they hawk that costs $10 bucks more a gallon. Glidden is the best for us. 


I love how the black looks on the new travertine floors…


Previously, this wall (below) was covered with a 4 foot long, decorative plate shelf. It really needed a facelift, and I knew I wanted some kind of family Gallery Picture Wall. I found what I was looking for at Rodworks down in Draper. Link HERE I brought the plate rack up to my craft room where I am presently painting it white to go up there to hold some little pastel buckets for all my craft junk.  (another post later on…)


Here’s a pic I found of the plate rack in the background…barely showing…here’s all my boys…being cute…
Oh! You can also see the color the chairs used to be….light oak…look to the left…that’s the best I can do on before pics.

 Anyway, Rodworks has lots of great ideas and will help you figure out what you need to decorate any large or long wall in your house. I bought this cool wrought iron decorative rod there and I bought the 2 black wrought iron “cones” to use as seasonal flower holders. I change them up from Christmas greenery and holly berries and jingle bells at Christmas to pink and yellow and pink beaded greenery at Easter to orange and brown and green fall leaf sprays and pine cones at Thanksgiving. You can see the sugared hearts I have in there for Valentines now. It is fun to change the ribbon colors occasionally too. They are only up there as decoration. They are just stuck to the back of the frames with double stick tape.  The medallions in black wrought iron on the left and right at the bottom (covered with a ribbon) are also from Rodworks. All of the wrought iron probably cost me about $40.00. I think I had some coupons too.

Gallery Picture Wall: My kids remark that it’s all about the grandkids now….I think they are right!

The time consuming thing was actually finding and getting sepia copies made of all these pictures in the Gallery Picture Wall and finding frames that were similar but not all the same. I wanted some variety but all white matting and black frames. Some of these I repainted from other colored frames I had around the house. Some I bought new from Michaels, Roberts or Kohls. Kohls is really great for sales on pictures of all kinds and decorative frames. Plus I’m in like their gold star customer club or something since I used to work there when I was getting my master’s degree (had to pay all that tuition) so I always get coupons. Gotta love coupons.

 My daughter had lots of cute pictures of my granddaughters who naturally are the stars of the picture wall. She deserves a high 5 for helping me with this. She had done a picture wall at her house with all 8 x 10s and sepia prints and it is beautiful. Her wall gave me the inspiration for mine.


Here are the metal cones at Christmastime…in the Gallery Picture Wall
I change them up for each season with just a little tweak


My family Gallery Picture Wall…this is fun to change up seasonally…


The next thing we decided on was travertine floors. They are hard and cold in the mornings and anything you drop on them is instantly going to shatter, (trust me on that, and I mean SHATTER!!) but I still love them. I love floors that hide dirt and travertine is the master at that, with all the natural blotchiness it comes in. They match any decor and they look very beautiful even when they haven’t been washed in weeks. When I do vacuum and clean and polish the travertine floors  they just shine like brand new. The travertine floor tiles were one thing we both completely agreed upon. We were both willing to spend the extra money on travertine too. We bought it at Home Depot and had it professionally installed.  I think it will be a good resale value item that won’t go out of style. Maybe the knotty birch cabinet may looked dated in a few years, but not the granite nor the travertine floor tile.

Travertine flooring….natural stone hides a lot of stuff!

The backsplash we chose was also tumbled travertine and John did this himself. We chose a bit of decorative tiles to insert halfway down the backsplash. We still have not grouted it yet, but that will wait till we have a new burst energy, probably in the spring when things warm up a bit. (or maybe never again will we get burst of energy….I don’t know… 🙂


One other thing Mr. Moss and I did together was building some cornices over the window above the sink and one over the sliding glass door leading to the outdoor deck. That will be in the next post….
How do you like it so far?

Filed Under: Gallery Picture Wall, Travertine floors

Kitchen Remodel….Part 2

01/22/2011 by Pattie Leave a Comment

It’s funny but this thing happened over and over. I knew exactly what I wanted for sink fixtures and I knew I wanted a brown composite sink, not stainless, not porcelain. I wanted a unique design, some curves that were different, not just 2 square sinks, maybe even only 1 sink. My husband couldn’t see it and I couldn’t convince him to just go with it, so we compromised on a curvy 2 sink model. It’s okay, not my first choice, but a good compromise. And there is actually a curve around the faucet fixture! I just needed 1 curve, OK?


My brown composite sink & oil rubbed bronze 1 piece  fixture…love them both!


I looked long and hard for what I wanted and I had the hardest time finding it. Now those composite sinks are everywhere! The same thing happened with all my fixtures. I wanted brown, the oil rubbed bronze looking fixtures with only 1 piece, not a knob for hot or cold, just a 1 piece fixture. I looked at Home Depot, Lowes, Standard Plumbing, Overstock.com, they all had such a limited selection of them in the darker color, there was not many to choose from at each store. I finally found one I liked but it was expensive compared to the nickel or stainless finishes! And now I see them all over the place.

And don’t even get me started on the appliances, the fridge we got was counter depth (so NOT as much cubic feet as a regular fridge is) but it cost thousands more than a much larger capacity fridge with non-counter depth. Now how is that fair? Now Lowe’s has those brown composite sinks all up in a display! I saw one last summer at Costco even. And counter depth fridges are everywhere, not special order anymore, and much cheaper now too! Hmph!


Counter depth fridge…wish it was bigger…but I LOVE the
pantry cabinets we installed all around and above it! SPACE!!!


Anyway. We got some great deals on granite. We used the Stone Depot in downtown Salt Lake for our granite and I would recommend them to anybody. Link HERE It is a little mom and pop operation; a little Asian couple who were both very nice. The lady was pregnant and about to deliver her 2nd baby, but she would traipse around the granite yard with us, helping us search through all the selections from around the world, giving us advice. I went back 3 or 4 times before I made up my mind. We also bought granite, vessel sinks from them for our 2 bathroom remodels. They have quite a selection of granite.  I liked them a lot, they were very cute.The little Chinese lady laughed at just about everything my husband said. John can be a funny guy.


Johnny did the decorative backsplash himself…isn’t he qute the handyman?


finished kitchen….yipee!


I loved the lighting fixtures we picked out. The little pendant lights (from Lowe’s) add so much over an island. I loved the dark wrought iron design with the leaves curling around the smoky glass pendants. We tried to match an existing ceiling fixture we had bought from my daughter’s new house when she wanted to choose a more modern fixture for her kitchen. I happened to love hers and after she put it up for sale on KSL I told her take it down because I was buying it! Then we found matching pendants and ceiling flush lights for the adjoining den and wall sconces leading down to the basement. We lucked out here and found pretty good deals on all. And boy we had some UGLY lights before!


The pendants match all teh fixtures in the kitchen, den and hallways now…


I think we got the pendants at Lowe’s…my favorite place to get lighting


Fixture over the kitchen table….my daughter sold it on KSL….to me!
It has the similar leafy pattern and  the oil rubbed bronze look 


I found these little silver wall tiles to put around the stove area from a magazine and sent away for them. I think they were about $20 bucks. They are just peel and stick tin tiles, very easy to do yourself. They look cool and they are good to catch all the splashes.


I probably need to get up in there and paint in between….Uh…maybe not today tho…

 I need a little more lighting in the kitchen still but just have to wait on Mr. Moss to have another chunk of time to put in the canned lights in the ceiling. He kept telling me it would be easier to do it at the end of the job. I never believed him but it was, you know, another compromise. People always say, ” don’t remodel your house or you might end up getting divorced”. I know what they are talking about now. You have to get good at agreeing to disagree in a major remodel. Not every decision is reached with mutual love and respect. Sometimes you just go to your boxing corners and pout for awhile. Hmmm… Then you get over it and move on. More on our lovely demolition derby tomorrow…


Granite countertop Island and pendant lights


Filed Under: Granite countertops, Kitchen cabinets, Pendant Lights

Kitchen Remodel Part 1 (or Kitchen Nightmares?)

01/21/2011 by Pattie 2 Comments

I wish, wish, wish I had taken a before picture of the kitchen of our 1970s Tri level, all the way gutted with bare walls somewhat ripped up from demolition, and no ceiling, just attic and trusses up there with dust, and insulation constantly raining down from the attic. After they ripped the sink out it was so gross in there it scared me to walk through it alone. It was like a burned out building or a scary bomb shelter! They discovered some water damage in the wall behind the sink so it was black and soggy and scary, and I kept thinking about living things from the attic or from under the sink crawling out to get me. The bowels of your kitchen are really ugly and yuck. I never, ever will remodel a kitchen again. It is a KITCHEN NIGHTMARE!! (as Chef Ramsey would say…)

 My husband would be working with the plumber and the drywall contractor and he’d see me coming in the area and he’d just say, “You better get outa here….you better not look at this!” I get all heebie jeebies when there is anything gross, spiders, slime…I can’t handle much of that. 

Finished range and hood and backsplash
These tin tiles are simple peel and stick…so easy!

At one point in the kitchen demolition we had knocked out the lowered ceilings, and really wanted to bump it up to the interior rafters. It turned out we couldn’t knock out the trusses in the rafters because our house might just fall down. So we had to compromise and have just a raised ceiling. And that ugly light box everybody used to have with flourescent long, tube lights inside? So ugly! Who invented those anyway? That must have been the cool look in the 70s cuz everybody had them! So glad to see that thing take a hike. You can kinda see where it used to be. I haven’t painted over the plastering Robert (our drywall guy) did over the ceiling yet. I can’t paint again till Spring….or maybe summer…. (I’m lying again…I’ll be painting this weekend in my craft room…)

We raised the ceiling about 2 feet

I remember the day we tried to redo the drywall ceiling up there. My husband built some 2 x 4s into a giant T shape and said I’d have to ” help him put up the sheets of ceiling drywall.” SAY WHAT? Little did I know what I was in for.

We’d both carry in a sheet of drywall  from the pile in the truck he’d just purchased from Home Depot. That was bad enough. Those things are HEAVY bad boys! Then he’d hoist it up with his manly brute strength (I actually kinda liked watching that part, butt cracks and all) and then he’d tell me to grab the giant 8 foot tall T and to push up the drywall sheet for him to drill the screws. HUH? Are you Kiddin ME? Now, when I look back on that, I am very proud of myself. I pushed that giant,  hulking, sucker up there and he drilled the screws in with his favorite cordless power tool. You know men and their power tools. Pretty studly.


The finished island

We got sick of doing THAT after about 2 sheets and called in the cavalry. I think poor Robert, our contractor had to fix a lot of “do it yourself-er” stuff we thought 2 college grads should be able to do ourselves. We aren’t as smart as we think we are, as it turns out. I told Robert not to tell me what stuff he actually had to redo. I still want to think I helped with the HE-MAN work, if you know what I mean.


Our beadboard island…I painted it a sage green.


My favorite thing we did  together was our bead board island and the 2 wooden legs decorating the 2 end corners. John did the beadboard around the 2 sets of drawer units. We asked the company we bought direct from, (AWA Cabinets in Salt Lake Link HERE) to just not add decorative backing on these two. Then I went looking for a way to do “custom legs” on the 2 back corners without paying somebody to do it custom. I found some clearance table legs at Lowes way in the back on the wall. They were packaged as half legs. I bought 3 of them, had John cut 1 apart down the middle with the table saw, and glued one side on to each half leg, so it was a 3/4ths leg and then puttied in the seam with wood putty. John didn’t catch my vision at first but he just went with it…and figured out the math of fitting in these 3/4ths of a leg onto the 2 corners of the island. It was really fun as it came together! I think we rocked it. What do you think?

My favorite Do It Yourselfer Project….The island table legs!

It was looking like it would work to just hook the legs onto each 90 degree angle of the island back corners, but both legs were too short to reach the granite top. So we went back to Lowes and looked for some kind of decortive block to add to the top. John then cut a 1/4 slot out of each of the block sides (tricky to do) and glued them to the tops of the legs.  He added on the legs to the 2 corners, gluing them to the beadboard edges with Liquid Nails. That’s the stuff that comes in a long tube with a glue bottle point on one end and you shoot it from a gun. That stuff is miracle goop!  Then I picked out Glidden (my favorite paint) in eggshell finish and painted everything a light sage green. You can kinda see the seam from the glue together in this close up pic, but nobody else notices things like that. The legs ended up costing us less than $20 bucks! How’s that for custom?


You can see where we added the wood block to the top of the leg  😀


I was adamant that I wanted a wooden hood over my new stainless stove. I’d looked at so many online.   I knew pretty much what I wanted from looking through many, many kitchen magazines, but I didn’t want to spend thousands of dollars on one. I loved the pounded copper hoods but they were so pricey I didn’t love them THAT much. Custom hoods were out of our budget. So I looked around in the back rooms of cabinet manufacturing places. They always have things that have been returned. I think the place was called Excel Cabinets in downtown Salt Lake City, West of the freeway.


My $40.00 range hood…..it turned out nice!


We found one that we thought might work and bartered with the guy to pay $40.00 bucks for it. We took it home, sawed it in half to cut a piece out of the middle, and glued it back together at just the right width to fit in between the new cabinetry. We then covered the whole piece in beadboard. I remember the edges being hard for John to get just right, but we used some wood putty to fill in anything that wasn’t really flush. Lastly I found a swirly decoration for the front from Home Depot for a few bucks. It kind of goes over the seam from sawing the thing in half.


I found this piece of trim at Home Depot for $5.00


Then I painted it sage green to match the beadboard island. Both of them turned out really pretty. We put up the tin tiles above the backsplash that go all the way up the wall under the hood. Pretty!  I still have to get some lights under that vent. It’s not bright enough when I’m cooking in the kitchen. Lights are still a to-do item.  3 cheers for do it yourselfers!!! The last 3 projects coming up…

Filed Under: Beadboard Island and Hood, Great Places for Kitchen Remodeling

« Previous Page
Next Page »

Primary Sidebar

Recent Posts

  • RESTORE Deck Painting
  • Backyard Pond I’ll Miss You
  • Blue and Gray Kitchen Backsplash Remodel
  • Swiss Days 2015 in Heber Valley Utah
  • 4th of July Games and Foods

Recent Comments

  • Koi pond on Beautiful Ponds and Water Features
  • Natalie on Festival of Trees 2014 Salt Lake City
  • Pattie Moss on Handprint Ornaments
  • Pattie Moss on Holidays are over…Was it Everything you Thought it’d be?
  • Pattie Moss on Bridal Shower for My Niece Becky

Archives

  • May 2016
  • November 2015
  • September 2015
  • July 2015
  • March 2015
  • February 2015
  • January 2015
  • December 2014
  • November 2014
  • October 2014
  • September 2014
  • August 2014
  • July 2014
  • June 2014
  • April 2014
  • March 2014
  • February 2014
  • January 2014
  • December 2013
  • November 2013
  • October 2013
  • September 2013
  • August 2013
  • July 2013
  • June 2013
  • May 2013
  • April 2013
  • March 2013
  • February 2013
  • January 2013
  • December 2012
  • November 2012
  • October 2012
  • September 2012
  • August 2012
  • July 2012
  • June 2012
  • May 2012
  • April 2012
  • March 2012
  • February 2012
  • January 2012
  • December 2011
  • November 2011
  • October 2011
  • September 2011
  • August 2011
  • July 2011
  • June 2011
  • May 2011
  • April 2011
  • March 2011
  • February 2011
  • January 2011
  • December 2010
  • November 2010
  • October 2010
  • August 2010
  • July 2010
  • June 2010

Categories

  • # Halloween Brownies
  • #AshtonKutcherRocks
  • #Halloween Party Foods
  • 10 Reasons Fall is my Favorite Season
  • 10 Reasons Why FALL is My Favorite Season.
  • 3 Styles of Paper Snowflake Making
  • 4th of July
  • 4th of July BBQ
  • 4th of July Decorating
  • 4th of July Decorations
  • 4th of July Games and Food
  • 4th of July treats
  • A funny Mother's Day story
  • Airtight seed containers
  • and other Summer Fun Bands
  • and Spring Decorating
  • Anniversary Rings
  • Austin Hatch Basketball Player
  • Baby Dylan is born
  • Baby Shower
  • Backyard landscaping fixup
  • Backyard Ponds
  • Backyard Terrace Before and After
  • Baked Brie
  • baking with kids
  • Balloon Launch August 2011
  • bathroom remodeling
  • Beadboard Island and Hood
  • Bean and Corn Salsa
  • Bear Lake
  • Beautiful Flower Gardens
  • Beautiful Yards and Landscaping in Utah
  • bedroom remodeling
  • Bell Canyon Reservoir Hike
  • bird themed bedroom
  • Birthdays
  • Blackberry Peach Crisp Recipe
  • Blackberry-Peach Crisp
  • Blue and Gray Kitchen Backsplash Remodel
  • Blue Beachy Bathroom Remodeling
  • BOO Your Neighbors
  • Boston
  • Bridal Shower for my niece Becky
  • Brighton Ski Resort Hike
  • Broccoli and Bacon salad
  • Buffalo Chicken Tenders
  • Built in Pantry
  • Bulb Perennials I Love
  • bulletin board redo
  • Bulletin board repaint
  • Butterfly Art Project
  • Butterfly bulletin board
  • BYU Football Game 9/11
  • Caitlin's Baby Shower
  • Cecret Lake Hike
  • Cheesy Breadsticks
  • Chelsea Anne
  • Chelsea's First Birthday 2014.
  • Chicago trip and Lena's Blessing
  • Chinese New Year
  • choosing paint colors
  • choosing wood flooring
  • chore charts
  • Christmas cookies
  • Christmas Day Fun
  • Christmas Decor
  • Christmas decorating
  • Christmas Gift Wraps
  • Christmas handprint ornament
  • Christmas Letter 2013
  • Christmas parties
  • Christmas Parties 2012
  • Cinco de Mayo
  • Clothespin Craft
  • Cowabunga Bay
  • Cowabunga Bay and Bear Lake Fun
  • Cranberry Salsa
  • Cream Puffs
  • Credit Card Dept
  • cute giftwrap ideas.
  • Cute giftwrapping
  • Daffodils
  • Dance Recital Fun
  • Danny
  • Date Night
  • Daylillies
  • Days of 47 Parade floats
  • Deck Restore
  • Deck Restore Painting
  • Decorating
  • Decorating Christmas sugar cookies
  • Decorating for Spring
  • Decorating for Valentines Day
  • Deer proofing the yard
  • Demolition
  • Devin and Caitlin's Utah Wedding Reception
  • Devin's BYU Graduation 2012
  • Doctor's offices
  • Dog Lake Hike
  • Dollar Store kitchen finds….
  • Doobie Brothers
  • Doorway Wood Moldings
  • Down Home East Fixtures
  • Downton Abbey Premiere Viewing Party
  • Downtown Abbey Viewing Party
  • Dr. Seuss Day
  • Dried Apple Witches
  • Dylan's baby blessing
  • Easter
  • Easter 2012
  • Easter Decorating
  • Easter egg hunting
  • Easter Eggs
  • Easter Table decor
  • Elementary School
  • End of the World? Power of One
  • End table redo
  • End Table repainting
  • Fall Decor Using Pumpkins and Acorns
  • Fall decorating
  • Fall decorating fun
  • Fall Table and Mantle Decorating
  • family get togethers
  • Father's Day
  • Festival of Trees 2014
  • Find Your Strongest Life Quiz
  • First Day of Spring Gardening
  • Flag kid's Crafts
  • Flower for SUN
  • flower girls
  • Flowers for SHADE
  • Food blogs
  • Frozen Cookies
  • Frozen Finger Puppets from Felt
  • Frozen Party
  • Frozen Winter Activities
  • Fruit Trees
  • Fun Concerts
  • Fun Fall Jars
  • Fun Festivals of Utah
  • Gallery Picture Wall
  • Garden Glove Collection
  • Garden Party
  • Garden Wedding
  • Gardner Village 2012
  • Gardner Village Witch Scavenger Hunt
  • Gardner Village Witchfest and Witch Scavenger Hunt
  • giant paper ones
  • giant pumpkins
  • Gingerbread houses
  • Glass blowers at Thanksgiving Point
  • glass jewelry from tiles
  • glass tile necklace crafts
  • Going to College Week
  • Good movies I've seen lately.
  • Goodbye Derek Jeter
  • grandkids bedroom
  • Grandkids for the Weekend
  • Grandpa Don Moss' Birthday
  • Grandpa Moss' 87th Birthday Party
  • Granite countertops
  • granite vessel sinks
  • Great Places for Kitchen Remodeling
  • Great Room Redecorating
  • Guest bedroom redo
  • Halloween Birthday
  • Halloween Cupcakes
  • Halloween Cupcakes and Treats
  • Halloween Decor
  • Halloween Decorating
  • Halloween Decorations
  • Halloween Gram
  • Halloween Soap Pumps
  • Halloween Table Decoration
  • Halloween Table Decorations
  • Handmade window Cornices
  • Heidi's wedding
  • Highland
  • Hiking at Brighton
  • Hobby Lobby Fall Decorations
  • Hogle Zoo Zoolights
  • Holiday cards
  • Holiday letdown
  • Homemade Strawberry Pie
  • hostas and Iris and Daylillies
  • How to find great deals
  • Hydrangeas
  • ice castles in Midway
  • IHOP
  • IKEA spice rack's many uses
  • Indoor Potting Cabinet
  • Insect Repellent homemade
  • Jackson Hole Vacation
  • Jacuzzis
  • January Decorating
  • Jeff's 30th Birthday Party
  • Jet skis on Utah Lake
  • John Legend All of Me
  • John's Bike Race
  • Josie's 1st Birthday
  • Josie's 4th Birthday Party
  • Journey
  • Kids Christmas table
  • Kitchen cabinets
  • Kitchen remodel
  • Kool-Aid Playdough
  • Kool-Aid Playdough Recipe
  • Lake Powell
  • Last week of school 2012
  • Laundry Room Decoration
  • Laundry Room Organization
  • Lavender Gifts from the Garden
  • Le Jardin Reception Utah
  • Lemon Bars
  • Lena Madelyn Moss
  • Less Bill Gates in Education
  • Love Yourself More this Valentines Day
  • Make A marshmallow shooter gun
  • Mariner Guest Room Decor
  • Marisa turns 7 and Dylan turns 1
  • Marisa's 6th Birthday
  • Marisa's Birthday
  • Marisa's preschool graduation
  • Martin Luther King Day
  • Martin Luther King Day art
  • Mary's Lake Hike
  • Megan's soccer game 2012
  • Michelle Rhee
  • Military Treat for Super Bowl
  • mirror redo with molding pieces
  • More Steve Jobs
  • Mother's Day 2012
  • Mothers Day
  • mountain man bedroom remodel
  • Museum of Natural Curiosity
  • My Berry Gardens
  • My Birthday Party
  • My dog Bruce
  • My Favorite Children's Book
  • My Fruit Trees in the Garden
  • My girls….
  • My New Favorite Song
  • My Vegetable Gardens
  • Navajo Tacos
  • Needs versus wants
  • New Year's Goals
  • Oddballs like me
  • Olaf the Snowman
  • Old Faithful
  • Olympic Torch Art from Cone and Tinfoil
  • Oprah's Last Show
  • Organization Tips to Stay Neater
  • Organizing gardening tools
  • Our 33rd Anniversary
  • Outdoor Halloween Decorating
  • Outdoor Wedding Garden Party at Le Jardin in Sandy
  • Overspending
  • Overstock.com
  • Painting furniture 6 Tips
  • Painting the Front Door
  • Paper snowflake snowmen
  • Parade of Homes Alpine
  • Parade of Homes Highland
  • Parade of Homes in Alpine Utah Part 5
  • Parade of Homes Part 2
  • Parade of Homes Part 3 in Highland
  • Parade of Homes Utah
  • Park City Art Festival
  • Park City Arts Festival 2012
  • Peach Crisp
  • Peach tree harvest
  • Pendant Lights
  • Penguin poetry
  • Penguin Tear Art
  • Petting Zoo
  • Picasso
  • Pies
  • Pilgrim cookies
  • Pilgrim Hat Cookie
  • Pine Cone Turkey Placecards
  • Pinecone snowmen
  • Pioneer Day 2012
  • Playdough
  • Playdough Making
  • Polar Express
  • Polar Express Linden Utah
  • Pond flowers and lilly pads
  • Ponds
  • Popcorn Free Tags printables
  • Potato Salad with Bacon recipe
  • Pottery Barn Kids Easter table decor
  • Pumpkin patches
  • Putting away Christmas
  • Quad Riding in Bear Lake
  • Redondo Beach
  • Reese's Peanut Butter Cookies
  • Refinishing Wood table and hutch
  • Remodeling a Beachy Bedroom
  • Remodeling bathrooms
  • Repainted Cabinet
  • Repainting an End Table
  • Repainting an old end table
  • Restore Deck Paint
  • Resurrection Easter Eggs
  • Revive Deck with DECK RESTORE PAINT
  • Rice Crispy Treat Pops
  • Roseanne's Egg Noodle recipe
  • Salads
  • Salt Lake County Fair
  • Salt Lake Parade of Homes 2014
  • Santa Handprints and Letters to Santa
  • Scarecrow Cupcakes
  • Schools Out
  • Schools Out for Summer
  • Sick Days
  • snow canyon 2011
  • Snow Sledding in Utah
  • Snow Weekend
  • snowflakes
  • Snowmen Stories
  • songs
  • Spray Painting Furniture Tutorial
  • Spring Break
  • Spring Dance Recital 2012
  • St. George Activities
  • St. Patrick's Day Decorating
  • St. Patrick's Day Fun
  • Strawberry Pie
  • Stringtown USA
  • Stripping Wallpaper
  • Sugar Cone Christmas Trees
  • Summer Company
  • Super Bowl Fun
  • Super Bowl Madonna Show
  • Super Bowl Party
  • Super Bowl Party Foods
  • Sven Reindeer Cookies
  • Swiss Days
  • Taking Down Christmas
  • Teachers
  • Teaching
  • Tealights from a Tuna Can
  • Thankgiving decor
  • Thanksgiving
  • Thanksgiving cupcakes with the girls
  • Thanksgiving Decorating
  • Thanksgiving Desserts
  • Thanksgiving Foods I love!
  • Thanksgiving Point Museums
  • Thanksgiving Point Trip
  • Thanksgiving Point Tulip Festival
  • Thanksgiving Side Dishes
  • Thanksgiving table decor
  • The Crater
  • The View
  • Thriller Flash Mob 2011 Park City
  • Tiling floors
  • Trader Joe's Cookie Butter
  • Trains
  • Travertine floors
  • Trip to the Living Planet Aquarium
  • Tuacahn
  • Tulip Festival at Thanksgiving Point 2012
  • Tulips
  • Turkey crafts
  • Turkey Cupcakes
  • Tutorial:How to plant Bulbs
  • Uncategorized
  • Under the Deck Seating
  • Utah 2014
  • Utah Hikes
  • Utah home
  • Utah Part 4.
  • Utah Part 7
  • Utah.
  • Utah. My Niece Heather's Wedding Day
  • Valentine Card Holders
  • Valentine Cookies
  • Valentine Decor
  • Valentine Decorations are Done
  • Valentines
  • Valentines Day Craft
  • Valentines Day Decorating
  • Valentines Day Dinner Table Decorations
  • Valentines Decorating
  • Valentines Decorating Fun
  • Valentines Decorations
  • Valentines Party Games
  • VMAs 2011
  • water features
  • Wedding Decor
  • Wedding decorations
  • Wedding of the year
  • Wedding Reception at Wadley Farms in Lindon
  • Wedding Receptions
  • Wendover Peppermill concert Hall
  • When bad crap happens
  • Why Amazon Echo and Superman are Cool!
  • Why I like James Altucher
  • Wingers Copycat Sauce
  • Winter Dance Recital 2012
  • Winter Dance Recitals 2013
  • Winter ourtoor decor
  • Witches and Minnie Mouse
  • wood floors
  • wooden Scrabble tile jewelry
  • Words of Comfort
  • Worst Day EVER!
  • Worst Day of motherhood
  • Yellowstone Road Trip
  • Yellowstone trip
  • Yummy Dip recipes
  • Zions Park
  • Zuchini Chicken or Beef Chili
  • Zupas and Beyond Glaze Birthday Lunch

Meta

  • Log in
  • Entries feed
  • Comments feed
  • WordPress.org

Copyright © 2026 Pattie's Place on the Foodie Pro Theme